Saturday, April 30, 2011
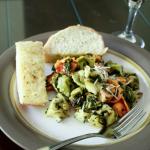
Ham and Pineapple Asian Noodles (Redux)
6 oz whole wheat spaghetti (about 1/3 of a box of spaghetti)
2 cups broccoli crowns
1 cup diced ham
1 clove garlic, crushed
1 can pineapple tidbits (juice reserved)
1 tbsp soy sauce
1/2 cup calorie-reduced catalina dressing
1/2 bag of bean sprouts, rinsed
Boil water and cook spaghetti according to package directions. In last 5 minutes of cooking time, add broccoli. In the meantime, combine ham, garlic, pineapple, soy sauce, catalina dressing and bean sprouts in a large non-stick skillet. Cook over medium heat for 3-5 minutes. Once spaghetti and broccoli is done cooking, drain and add to skillet. Add about 1/4 cup of the reserved pineapple juice and stir until fully combined.
My original Ham and Pineapple Asian noodles recipe is good, but I knew it could be better and a little healthier. In this version I’ve replaced the fried noodles with whole wheat spaghetti noodles. I’ve also changed some of the ingredients to suit my taste. I love broccoli with ham, so I decided to use that instead of green peppers. I also happened to have some bean sprouts on hand that I needed to use up, so I threw those in too. I left out the ginger because I’m not a big fan of ginger, and used garlic instead. My family liked this meal just as much as the original, if not more. Pineapple, ham, broccoli and spaghetti are some of Cole’s favourite foods, so it was a big hit with him especially. Cole doesn’t love a meal very often, so when I find one like this that he love it’s one that I’ll keep coming back to.
Wednesday, April 27, 2011
Impossible Coconut Pie
1 cup flaked coconut
4 eggs
1 teaspoon vanilla extract
1/2 cup all-purpose flour
6 tablespoons margarine or butter
3/4 cup white sugar
Place all ingredients into blender and blend until smooth. Pour into a greased and floured 10" pie pan and bake at 350F for 45 minutes.
I don't know why it's taken me so long to post this recipe; it's one of my favourites. It's a very kid-friendly recipe because children can help pour all the ingredients into the blender and watch it blend. I used to like to help my mom make this when I was a kid, and I remember it seemed almost magical the way it forms a crust, then creamy custard, then a layer of coconut on top. The crust isn't a pie crust in the traditional sense, but there is a thin golden outer layer that lifts out of the pie plate easily. We usually have some kind of dessert on Sundays, and I like to make this recipe on those Sundays when I'm short on time and energy. It's also great that the ingredients are all typically found in my kitchen in case I haven't planned a dessert ahead of time. The kids and Tony all seem to enjoy this pie a lot and so do I. They'd probably like a real pie even better, but I am sadly deficient in that area. I just can't seem to make a decent pie crust! If you like this pie, be sure to check out this pumpkin version we made a while ago; it's quite yummy too.
Tuesday, April 26, 2011
SmartSeat Giveaway Winner
Now finally, the winner is...
Friday, April 22, 2011
Tips for Feeding Picky Eaters
Yesterday I shared a guest post by Anne Simpson from Quick and Easy, Cheap and Healthy where she reveals a number of great methods to make the most of your citrus fruit. I never knew you could use limes in so many different ways. Lime coffee, here I come! Today, she is sharing a post written by yours truly called Tips for Feeding Picky Eaters. Please stop by her site and take a look.
Thursday, April 21, 2011
Guest Post by Anne Simpson: Making the Most of It
“Waste not, want not.” Wise words from a bygone era that prove useful in these times of soaring fuel and grocery prices! “Extreme frugality” has made a comeback it hasn’t seen since the thirties, when it was a habit borne of necessity.
If your own grocery budget is being stretched to the limit (and crowded out by the gas budget), you may be tempted to try a little extreme frugality of your own. Take a few lessons from previous generations and ask yourself, “Can I use this for something?” before you throw it away.
Citrus, for example. Most of the time, we eat the fruit (or juice it) and throw away the wrapper without a second thought. But consider the cost of citrus in most areas of the country, you may want to reconsider. There’s an awful lot you can do with the peel of a citrus fruit, not to mention the rest of it!
I happened to have a whole bunch of limes I bought on sale the other day, and I challenged myself to make the most of them by using every last bit of each one. Next time you have your own stash of citrus, try some of these ideas... and save some money in the process!
(I used limes, but most of these ideas are applicable to all citrus fruits.)
1. To start with, remove the peel first, before eating or juicing the lime. You can do this by using a microplane grater, or simply peeling it into strips with a vegetable peeler (try to get as little of the pith as possible). If your recipe doesn’t require the zest, pop it in the freezer and save it to use another day in one of the following ways:
- Grind up some lime peel (a couple small strips) with your coffee beans. Or if you have zest (1/2 - 1 tsp), add it to already-ground coffee. If you’re skeptical, just give it a try: it’s amazingly delicious! I also added a little dried ginger to my coffee grounds, and experienced some gourmet coffee for practically pennies.
- Make some simple syrup. Lime simple syrup is delicious in iced tea or coffee, sparkling water, punch, cocktails, etc. The possibilities are practically endless! All you have to do is combine equal parts sugar and water (although I have used half as much sugar with good success, and some people use 2 parts sugar to water) with some citrus peel (I used 2 small limes in 1 cup of water and ½ cup of sugar.); bring it to a boil, then reduce the heat and allow it to simmer for about 15 minutes or so. Strain and store in the refrigerator. Use about a tablespoon of the syrup for each serving.
- Make lime sugar. Use the peel from one lime (either zested or in strips, doesn’t matter), and mix it well with 1 or 2 cups sugar. If the lime peel is in strips, press on them with the back of a spoon a bit as you are stirring it into the sugar, to release the oils. Allow to dry for an hour or so, then store in an airtight container or jar at room temperature. Sweeten hot beverages with it; bake cookies, cakes, and even pancakes with it; sprinkle desserts with it; or top your fruit salad with it. Once again, the possibilities are endless!
- In a similar vein, make Lime Salt. I’ve personally never tried it, but I just came across this easy recipe at I Have a Lemon Tree, and I can’t wait to try it with my next batch of citrus!
2. Now that you’ve used every last bit of the peel, you’ll want to juice the limes, and you’ll get a lot more juice if you pop them in the microwave for about 20 seconds, then roll them around the countertop while applying pressure with your palm. Once you’ve got the juice all loosened up, you can slice it in half and either squeeze with your fingers or use a juicer.
3. So, you’ve used up the peel, and you’ve maximized the amount of juice, now what to do with that shell of pulp and pith? Unfortunately, it’s not really edible, but don’t worry; it hasn’t run its course yet! You can still use it for cleaning; in fact, it is so perfect for that task, it almost seems made for it!
- Use one lime half like a sponge, and scrub your wooden cutting board with it. This is especially useful immediately after chopping garlic or onions on your cutting board. Wipe the board with a damp rag and then dry thoroughly.
- Make a lime-scented cleaner (just as effective as homemade vinegar sprays, but a lot more pleasant to smell!): place whatever’s left of your lime (including any peel you might still have) in the bottom of an airtight container, preferably a jar. Pour vinegar until the fruit is all covered. Seal and store undisturbed for 2-4 weeks, or until the vinegar smell is replaced by a citrus smell. Strain and pour into a spray bottle. This is particularly useful for scrubbing stubborn stove-tops, but is a multi-purpose cleaner than can be used anywhere.
- Clean your oven. Place the limes in a shallow pan and cover with water. Turn your oven to 350F, and “cook” your pan of citrus for 15-20 minutes. Allow the oven to cool until it is safe to touch, then use a damp rag to wipe all the surfaces. I was amazed at how quickly some built-up grease on the oven door just wiped right off!
4. There is still one more task your limes can do, even if there’s just a pile of pulp left. With their last gasping, final breath, run them through the garbage disposal, inhaling the fresh aroma as they descend to their watery grave.
Now, if only I can find a use for those banana peels...
When she’s not busy concocting something new in her kitchen, Anne Simpson can be found blogging about it at Quick and Easy Cheap and Healthy, where she shares how to make healthy food without wasting any time, money or energy. You can also find her at When Food is Dangerous, where she blogs about life-threatening food allergies.
Monday, April 18, 2011
Maple Pecan Granola Bars

Saturday, April 16, 2011
SmartSeat Chair Protector Review and Giveaway

Kids can be rather messy at the dinner table, in case you hadn't noticed. Clearly, I didn't realize this fact when I purchased diningroom chairs with white seat cushions shortly before we had children. We ended up re-upholstering our chairs with a vinyl faux-leather fabric which works pretty well, but if you don't want to go to that extreme with your own chairs, you should definitely consider these great SmartSeat chair covers. SmartSeat is a patent-pending product made by pb&j Discoveries LLC, a parent-owned company based in Massachusetts. The company sent me a cover to try out on my messy children (they ship to Canada, yay!). It was a cinch to attach to my chair when I followed the video demonstration on their website. Cole noticed it as soon as he got home from daycare and was very impressed by how soft it was. I captured this video of him:
Bennett immediately tried to rip it off the seat, but it wouldn't budge, thanks to the super sticky velcro straps holding it in place. He eventually gave up and sat on it. There was quite a lot of food spilled on it over the following week, not to mention cat hair since our cat decided the seat cover was his new favourite sleeping place.
By the end of the week, the cover looked like this:
Not too bad! Not much of the food that spilled actually stuck to the cover, so that was a big plus. I gave it a quick wipe with a damp cloth, and it was good as new:
I can see this product being very useful for a lot of families with young children (and cats!). It comes in a variety of stylish colours so your seats can still look great while being protected from stains.
SmartSeat Giveaway
If you'd like to win one of these covers, please leave a comment on this post telling us who is the messiest eater in your family?
Please make sure I have your email address so we can contact you if you win.
You can receive bonus entries by doing any of the following (just make sure to leave a separate comment to tell me each bonus entry you do):
- Share this giveaway on Facebook, Twitter, or blog
- Follow us on Google Friend Connect
- Subscribe to us by Email
- Follow us on Twitter
- Like us on Facebook
- Like SmartSeat on Facebook
- Follow SmartSeat on Twitter
- Follow SmartSeat's blog (RSS)
This contest will close Saturday April 23 2011 at midnight PST.
Contest is open to residents of US and Canada. Winner will be chosen by http://www.random.org/. The winner will be announced in another post and contacted by email.
Monday, April 11, 2011
Butternut Squash Pasta with Wonton Wrappers
Like my nails? I had a manicure (very rare for me). The polish only lasted two days before chipping off, so I'm glad I have these photos to remember the brief moment when my hands looked pretty.
Anyway, back to tortellini. Now bring the two far corners together and wrap them around the center. Wet the end so it sticks and holds together.
Using wonton wrappers to make ravioli and tortellini is an idea that has been floating around the blogosphere for a while now and was something I had been wanting to try. I finally got around to trying it and it definitely is a lot of fun! The wonton wrappers are easier than making your own pasta, but they are much thinner and more delicate than regular pasta, so some of the filling leaked out when I boiled them. The best advice I can give for these is not to overstuff or overcook them or they will leak. They were still mighty tasty though. I thought butternut squash and cheese would be a good filling, because I love Butternut Squash Lasagna so much. This is a similar idea, and just as yummy, in my opinon. The boys weren't crazy over them, but that's fine because then I had enough for leftovers for lunch the next day. I also have some in the freezer too, so I can't wait to have them again. I served them with butter, garlic, oregano, and parmesan cheese. It was divine! The boys just don't appreciate this kind of thing like I do.
Wednesday:
Thursday:
Friday:
Saturday:
Sunday:
Monday:
Sunday, April 10, 2011
Nutella-Filled Banana Muffins
And just look at that view! Mmm...
Wednesday, April 6, 2011
Strawberry Julius
1 1/2 cups strawberries
1 cup ice cubes
1/2 cup water
1 tbsp powdered milk
1 tbsp sugar
1/4 tsp vanilla extract
Combine all ingredients in a blender and blend until smooth.
This drink is one of those things that remind me of being a kid. My parents used to drop my brother and me off at the wave pool on the occasional weekend afternoon, and once we were done swimming we would go to the Orange Julius for a drink. The strawberry ones were my favourite. I wanted to share my favourite childhood drink with my kids by making it at home for them. It turns out that they love them just as much as I did (and still do!). To make them more authentic you can add more sugar and an egg white (this creates more foam), but for my kids' sake I only put in a tablespoon of sugar and no raw egg. You can also add in a banana to make it thicker and creamier if you feel like it. I hope we'll be enjoying many more of these cold drinks as the weather gets warmer.
Monday, April 4, 2011
Homemade Ketchup


 My kids like to whine, especially when it comes to the food they eat, but that doesn’t stop me from trying to make tasty and healthy meals for them. Follow along as I share family-friendly recipes and reviews from my picky family members, who I lovingly call “The Whine Critics.”