Saturday, September 28, 2013
Roasted Vegetable Soup with Herbed Dumplings
Roasted Vegetable Soup with Dumplings
- Preheat oven to 425 F.
- Line 2 baking sheets with parchment paper.
- Place onion, yam, carrots, beets and whole garlic cloves on one baking sheet, and the eggplant and tomatoes on the other.
- Lightly drizzle olive oil over the vegetables, then lightly sprinkle them with seasoning salt.
- Roast for 30-40 minutes, until the vegetables are soft and beginning to brown.
- Scoop out eggplant and squeeze out the garlic from their casings into a large soup pot or dutch oven.
- Add the other vegetables to the pot, along with 5 cups of vegetable broth.
- Blend with an immersion blender until smooth. Add another cup or more of broth if it seems too thick.
- Stir in cumin, bay leaf, and salt and pepper to taste.
- Bring soup to a boil, then cover and simmer on medium-low heat while you prepare the dumplings.
- In a bowl, combine flour, baking powder and salt. Cut the butter into the flour mixture with a pastry cutter until it forms fine crumbs.
- Stir in herbs and milk, and mix until fully combined.
- Drop tablespoons of batter into the simmering soup. Allow them to simmer in the soup for about 10 minutes, until cooked through.
Friday, September 20, 2013
Celebrate Your Everyday Moments with Yopa! Greek Yogurt
Sometimes the simple moments in your day deserve to be celebrated. Today I made it out to the grocery store with all three kids without a major meltdown. I say that warrants a little celebration! I like to indulge in a little cheesecake now and then, so I tried Yopa Greek yogurt in "Ooh-la-la! Strawberry Cheesecake" flavour.
Oh my. It was divine.
I've tried a lot of different brands and varieties of Greek yogurt, because I prefer the thick and creamy texture of it over regular yogurt, but I've noticed that it can be difficult to find a good fat-free Greek yogurt. The Greek yogurts with 0% fat don't often have the same silky, creamy consistency of their full-fat counterparts. I'm very satisfied with Yopa! It's thick, smooth and creamy, with just the right amount of sweetness. It's hard to believe it's fat-free and has only 80 calories per serving. Plus, with double the protein than regular yogurt, it sticks with you longer. There's also no gelatin or artificial colours/flavours.
I went a step further with this cheesecake yogurt and turned it into crustless mini cheesecakes (or I guess that should that be "yogurt cakes"?).
They're such a great guilt-free treat if you're craving cheesecake but could do without the calories. My kids liked them too! I think they could be good with vanilla wafers at the bottom, if you were wanting a crust.
Baked Strawberry Cheesecake Greek Yogurt Cups
Ingredients:
2 tbsp all-purpose flour
2 cups Yopa! "Ooh-la-la Strawberry Cheesecake" Greek Yogurt
1 egg, lightly beaten
2 tbsp granulated sugar
Directions:
- Preheat oven to 350F and line muffin tin with 12 liners (I used silicone liners).
- Combine ingredients in a bowl. Pour mixture evenly into muffin cups.
- Bake for 26-28 minutes, until yogurt has set.
- Allow to cool completely, then chill in refrigerator for several hours.
We also tried Yopa! yogurt in "Very Berry Lush!" flavour and my little whine critics enjoyed it, especially topped with granola and berries. There are so many fun flavours to choose from (like Lotta Pina Colada and Va-Va-Vanilla Bean) that I'm sure we'll be heading back to the grocery store for more...which will require another celebration! Lucky me.
Yopa! Giveaway
This giveaway will run between September 20th to October 20th 2013. I'll be closing the entries and randomly drawing a winner on October 17th in order to give the winner time to claim their prize before October 20th.
Mom Central will be sending the winner their prize 4-6 weeks after the campaign ends.
You may enter across multiple blogs, but may only win one prize pack.
Join in on the #OpaYopa Twitter party happening September 24 at 8pm EST.
a Rafflecopter giveaway
Disclosure – I am participating in the YOPA Blogger Campaign by Mom
Central Canada on behalf of General Mills, and received compensation as a thank
you for participating and for sharing my honest opinion. The opinions on this
blog are my own.
Tuesday, September 17, 2013
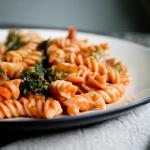
Kale, Broccoli & Bacon Rotini
When I started making this dinner, I wasn't even intending to blog about it. We had come home late from running errands and I had to whip up something quickly so we could get the kids to bed on time. I took a peek in the fridge and pulled out a few items that needed to be used up. I found kale, broccoli, half a jar of pasta sauce, and 5 strips of bacon. It was like my own version of Top Chef. I was short on time, and I had to work with what I had on hand. The result happened to be a very tasty meal that I hope to make on purpose next time.
As soon as the boys tasted this meal and insisted I should take their picture for the blog
"You're going to write about this on the blog, right Mom? I think you should," Cole advised me.
He finished everything on his plate and asked for more...and he ate that too! He was so impressed with himself for finishing two helpings. Bennett had no problem eating all his dinner too, and gave it two thumbs instead of his usual one thumb rating. Cole miraculously gave it two thumbs up as well. That was a shocker after so many "so-so" reviews lately.
Kale, Bacon & Broccoli Rotini
Ingredients:
5 strips of bacon, chopped
3 cloves garlic, crushed
1 tbsp flour
1 cup milk
2 cups kale, chopped
1 head broccoli, chopped
1/2 box whole wheat rotini noodles (about 185 g)
1/2 jar pasta sauce (about 350 ml)
Directions:
- In a skillet over medium heat, cook bacon until browned.
- Add garlic, saute for a minute
- Sprinkle bacon and garlic with flour, then whisk in milk. Bring to a boil, whisking until thickened.
- Reduce heat and add kale. Cook until kale has wilted.
- Meanwhile, boil pasta according to package directions. Add broccoli for the last 5 minutes of cooking time. Drain and add to the skillet of bacon and kale.
- Add pasta sauce and stir until full combined.
Serves 4.
Friday, September 13, 2013
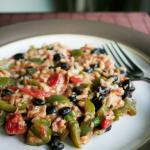
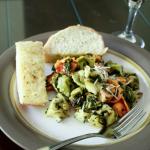
Roast Chicken Thighs with Fennel and Lemon
Fall can be a busy time of year for many of us with children going back to school and starting activities. Dinner becomes a rushed affair, leaving us stressed out as we try to come up with simple and fast meal ideas. Chicken is my go-to meal idea during these busy times. When Tony asks what we should have for dinner, I find myself saying, "well, there's always chicken..."
That still leaves the problem of what to do with the chicken. Luckily, there are a lot of creative chicken recipes out there, and this chicken with lemon and fennel is one of them. It looks and tastes like a fancy meal, but it's so simple to throw together.
If you've never cooked with fennel before, this recipe is a great chance to try it out. It's crunchy and slightly sweet, and surprisingly high in nutrients. It makes chicken so much more interesting and sophisticated.
Cole was in a very grumpy mood that day, so he didn't like dinner and wouldn't pose for a photo. In his place is his little sister, Ayla, who is just learning about eating solid foods. She gobbled this up, but that was no surprise. This baby will eat anything, and I mean anything that she can get her chubby hands on. I actually found a staple in her mouth the other day (eek!).
Bennett liked it, except for the olives. He asked me what the "yucky green things" were, and spit them out into a disgusting blob on his plate. He ate everything else though, so I think that's pretty good. I don't know many kids who actually like olives. Cole liked them briefly as a toddler, but only the sliced black ones because they looked like wheels to him. I happen to love them, but I realize they are an acquired taste.
Tony liked this meal, or at least I think he did. He certainly made a lot of "mmmm" sounds.
Roast Chicken Thighs with Fennel and Lemon
Adapted from The Kitchn
Ingredients:
1 1/2 cups new potatoes, quartered
8 boneless skinless chicken thighs
1 fennel bulb, chopped
1 tbsp fennel frond, minced
4 stalks celery, sliced
4 cloves of garlic, crushed
2 tbsp olive oil
2 tbsp white wine
1 lemon (juice and zest)
3/4 tsp kosher salt
1/4 cup diced olives
Directions:
- Preheat oven to 425F.
- Place quartered potatoes into a microwave-safe dish. Fill with about an inch of water at the bottom. Cover the dish and microwave on high for about 8 minutes, or until potatoes can be pierced easily with a fork.
- While the potatoes are cooking, prepare the remaining ingredients and place them in a large bowl.
- Add the cooked potatoes to the bowl and toss the ingredients together, then pour them onto a foil-lined baking sheet.
- Bake for 30 minutes, or until the chicken is cooked through and everything has begun to brown nicely.
Serves 4. Can be served with rice or bread, or on its own.
If you like this recipe, here are some other ones you might enjoy from Life Made Delicious:
Penne with Portabella Mushrooms and Fennel
Fennel Crusted Beef Strip Loin Roast with Port Wine Sauce
Roasted Garlic Oven Baked Chicken
Lemon-Thyme Chicken Legs
Here's the latest news from General Mills to share with you. There's a new brand of Greek yogurt called Yopa! I'm a big Greek yogurt fan so I can't wait to try it out. Speaking of yogurt, don't forget Yoplait yogurt tubes for school lunches.
Also, if you visit the Life Made Delicious facebook page, you'll find out how to get a $1 off Butterball turkey and Chex cereal.
Disclosure: I am part of the Life Made Delicious Blogger Program through Mom Central Canada and I receive certain perks as part of my affiliation. Opinions are my own.

Monday, September 9, 2013
Chicken and Spinach Taquitos
As you may have guessed by my lack of blog posts lately, this month has been crazy busy so far. The boys were both born in September, and now that they're older and have their own sets of friends, they want their own separate birthday parties. My family also wanted to celebrate their birthdays with them, so we still do a joint birthday party for them as well. That's 3 parties to plan, so I made it as easy as possible on myself this year. I decided not to make my own cakes, and I think that was the best decision ever.
Cole had his friends over for a pajama party and we ordered pizza and watched movies. I made cupcakes with a cake mix and I let the kids decorate them. They had such a good time that Bennett decided he wanted to do the same thing for his party. We'll be doing that next weekend. This past weekend, we had some of our family over for a birthday get-together. I hesitate to even call it a party because it was very low-key and there was very little planning involved. I bought pretty much all the food, even the cake. We opened presents, ate cake and visited. It was perfect.
The boys also started school and Bennett is on a gradual entry schedule for kindergarten, so I've been doing a lot of trips back and forth to the school. Poor Ayla hasn't been napping well because I keep interrupting her naps to get to the school. She's also teething and just cut her first tooth a few days ago. Needless to say, she's pretty unhappy and tired, and so is her momma. At the moment, the boys are at school and Ayla is napping. I have an hour of peaceful "me" time before I have to pick up Bennett. And so I blog. And drink coffee.
Today I'm posting about chicken and spinach taquitos. I was inspired by this post by Healthy Delicious when I saw it on Pinterest. I happened to have cooked shredded chicken left over from tacos, so it was a good opportunity to give taquitos a try. You could use rotisserie chicken too.
THE WHINE CRITICS
Cole was not a fan. Apparently he doesn't like spinach anymore, which was news to me. He used to like it because we told him it gave him big muscles like Popeye. I guess he realized that wasn't true. Bennett liked them and asked for more. I think the leftovers would be great for school lunches.
Chicken and Spinach Taquitos
Ingredients:
2 tsp olive oil
1/2 cup diced red onion
1 clove garlic, crushed
1 tsp chili powder
1/2 tsp cumin
1/4 cup diced cilantro
1/2 cup salsa
2 cups fresh baby spinach
2 cups cooked shredded chicken
salt, pepper
1 cup grated cheddar cheese
5 9" flour tortillas
Directions:
- Heat oil in a skillet over medium heat. Add onion, garlic, chili powder, and cumin. Saute until onion is soft and opaque.
- Add cilantro, salsa, spinach and chicken. Cook until spinach has wilted.
- Add salt and pepper, to taste.
- Cut tortillas in half and put about a tablespoon of the chicken mixture along the straight edge of the tortilla. Sprinkle with cheese. Roll up the tortilla, beginning at the straight edge. Repeat with remaining tortillas.
- Place tortillas seam-down into a greased baking dish and bake at 450F for about 16-20 minutes, turning them over half-way through. Watch them carefully so they don't burn.
- Serve with guacamole and sour cream for dipping.


 My kids like to whine, especially when it comes to the food they eat, but that doesn’t stop me from trying to make tasty and healthy meals for them. Follow along as I share family-friendly recipes and reviews from my picky family members, who I lovingly call “The Whine Critics.”


